Saturday, September 28, 2013

Buckwheat Bread

On a beautiful fall day in the Shenandoah Valley, we stopped in Wade's Mill in Raphine, Virginia, and much to my delight, I found that the store was selling some of its milled products including the much elusive (at least in Henrico, VA) buckwheat. I grabbed the last two bags!

I haven't wasted any time trying out my buckwheat. Today I made buckwheat bread with a recipe I found on the internet (and yes, I made some adjustments), and it is a keeper.


Wade's Mill in Raphine, Virginia, built around 1750

 
Buckwheat Bread
 
1 1/2 cups glutenfree flour
1/2 c buckwheat flour
3 tsp baking powder
1/4 tsp xanthan gum
1/2 tsp salt
2 tbsp sugar
2 egg whites or 1 egg
1 c reduced fat milk
1/2 c vegetable oil
 
 
1. Preheat oven to 350 degrees.
 
2. Grease a medium sized loaf pan.
 
3. Sift flours, baking powder, xanthan gum, salt and sugar in a large bowl. Set aside.
 
4. Beat egg or egg whites. Stir in milk and oil.
 
5. Add flour mixture to egg & milk mixture, and beat for 3 minutes.
 
6. Pour mixture into prepared pan. Bake for 40 - 55 minutes.
 
7. Remove from oven and cool for 10 minutes. Remove from pan and cool on wire rack.


Note: Store buckwheat flour in the fridge or freezer for a longer shelf life.


Thursday, September 12, 2013

Peanut Butter Frosting


3/4 cup smooth peanut butter
1/2 cup butter, softened
3 cups icing sugar
1/3 cup milk
1 tsp. vanilla extract
 
 
1. In an electric mixer bowl, beat peanut butter and butter until combined and fluffy.
 
2. Add vanilla extract and beat well. Add a 1/3 of icing sugar until well combined and add 1/2 of milk and beat well, and continue until sugar and milk are used up. Beat on high speed until light and fluffy.
 
3. Makes 2 1/2 cups frosting for 24 cupcakes.

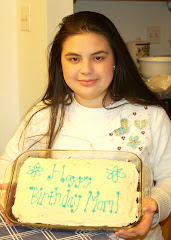
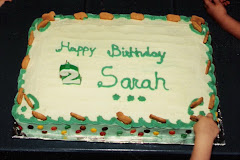
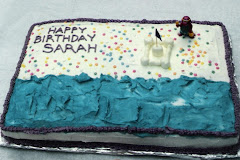
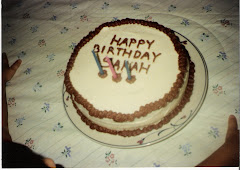
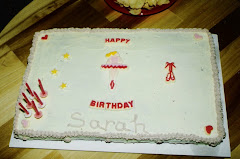
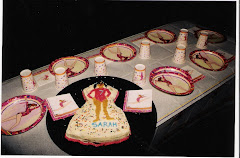
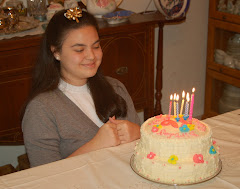
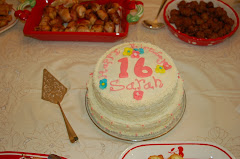
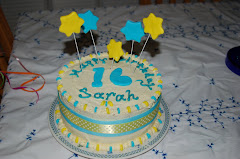
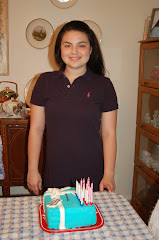
Happy Birthday, Sarah!


There is no need to ask Sarah what kind of cake she wants -- it is always going to be devil's food cake with buttercream frosting! The question is -- what kind of design does she want? This year she wanted something called Dave, the Minion cake. I had never heard of or seen the movie and so I had to google Dave the Minion, and after studying a few birthday creations, I came up with my own.

First there was the devil's food cake to be made. I have a tried and tested recipe that I have been using for a number of years.


Deeply Dark Devil's Food Cake 

 
1 3/4 cups all-purpose flour
2 tsp. baking powder
3/4 tsp. baking soda
3/4 tsp. salt
2/3 cups Dutch-processed cocoa powder
11 Tbsp. butter, softened
1 1/2 cups sugar
2 large eggs, room temperature
1 tsp. vanilla extract
1 1/3 warm water or milk
 
 
1. Preheat oven to 325 degrees. Butter and flour a 11 x 7 x 1.5 - inch rectangular glass pan and set aside.
 
2. In a medium bowl mix flour, baking powder, baking soda, salt and cocoa powder. Set aside.
 
3. In the bowl of an electric mixer, beat the butter at medium speed until creamy, about 1 minute. Gradually add the sugar and beat at high speed until light and fluffy.
 
4. Beat in the eggs, one at a time until well mixed. Add vanilla extract and beat well.
 
5. At low speed add the flour mixture in three additions and alternate with warm water or milk in two additions.
 
6. Pour the batter into the prepared pan and smooth the top. Bake the cake for 45 to 55 minutes until a cake tester inserted into the center of the cake comes out clean. If making cupcakes, bake for 18 - 20 minutes. This batter will make 24 cupcakes.


To make Dave the Minion Cake 


Work on the cake when it is completely cool


Round off the edges of the cake


Cover 3/4 of the cake with yellow colored buttercream frosting, shaping
the bottom to leave space for the top of a bib overalls

 
Using blue buttercream frosting fill in the bib overall and pipe two straps. Use brown M&Ms
for the buttons. Take apart two double stuffed Oreo cookies, place a brown M&M
on each cookie, use the silver rings from two Mason canning jars for Dave's glasses -- position the glasses before placing the cookie eyes in. Using black icing pipe Dave's mouth, his hair and the side of his eye glasses

 
Dave's stringy hair


The happy birthday girl


Sunday, September 8, 2013

Blackberry Cobbler


August means a trip up to our land in Derby, Vermont, to pick blackberries. This year John made that trip by himself because I am trying to preserve my limited vacation for our trips to the Homestead and to Hawaii. My good husband picked enough for me to make a cobbler and to freeze enough for use later in the season.
 
Instead of pouring a batter over the blackberry mixture, I decided to try using buttermilk biscuits on top of the blackberry mixture, simply because I wanted to try out the gluten free biscuit recipe.


Blackberries ripening on the vine on our Mad Moose Farms in Derby, Vermont
 
Blackberry Cobbler Filling
 
4 cups blackberries
1 cup granulated sugar
2 Tbsp corn starch
1/2 tsp lemon juice
 
 
1. Place blackberries in a large saucepan. Using a potato masher, crush blackberries, and then stir in sugar.
 
2. In a small bowl, mix corn starch with enough blackberry juice to form a smooth paste. Mix corn starch mixture into blackberries in the saucepan. Add lemon juice.
 
3. Bring blackberry mixture to a boil, stirring often, until thickened, about 15 - 20 minutes. Remove from heat and cool.
 
4. You can cool off the mixture and place in a covered container and store in the fridge, or before it's cool, you can can place in canning jars, process and store until needed. You can use this mixture as a jam, or filling for cobbler or a blackberry pie.


Buttermilk Biscuits


3/4 Brown Rice Flour Mix
1/4 sweet rice flour
3 tsp. granulated sugar
2 tsp. baking powder
1/4 tsp. baking soda
1/4 tsp. xanthan gum
1 Tbsp. buttermilk powder (or other dried milk powder)
1/4 tsp salt
5 Tbsp. cold unsalted butter, cut into five pieces
1 large egg, separated
3 tbsp. water
 
 
1. Preheat oven to 425 degrees.
 
2. Mix Brown rice flour mix, sweet rice flour, sugar, baking powder, baking soda, xanthan gum, buttermilk powder, and salt in a large bowl of electric mixer. With mixer on low speed, cut butter into flour mixture untile mixture is crumbly and resembles coarse meal. Put mixture in smaller bowl and set aside.
 
3. Beat egg white in the same large bowl until very foamy. Add water, beaten egg yolk, and flour mixture all at once, and mix at medium-low speed for 1 minute. Use lightly floured hands to pat out dough into a large 3/4-inch-thick on lightly floured surface. Cut out biscuits with a 2-inch round cookie cutter. Press dough scraps together and repeat.
 
4. Place biscuits on lightly greased baking sheet, and place in oven. Turn oven temperature down to 400 degrees. Bake 15 - 18 minutes or until medium golden brown.
 
5. Serve hot with butter and jam.
 
6. Makes six biscuits.


Blackberry Cobbler


1. Place blackberry mixture in a small rectangular dish large enough to hold blackberry filling and six buttermilk biscuits. Sprinkle teaspoon of granulated sugar on biscuits. Bake in 35o degree oven for 10 - 15 minutes until blackberry mixture is bubbly.
 
2. Serve hot with vanilla ice cream.


Blackberry cobbler is scrumptious with french vanilla ice cream or vanilla bean ice cream


Sunday, August 11, 2013

Brown Rice Flour Mix

This is the best gluten-free all-purpose flour mix that I've used. I love it! It's from Annalise G. Roberts' cookbook. I mix a new batch every weekend.


2 cups Brown rice flour (finely ground)
2/3 cup Potato starch (not flour)
1/3 cup Tapioca starch
 
 
1. Mix all together and store in an airtight container in the pantry.

GF Buttermilk Biscuits


3/4 cup Brown Rice Flour mix
1/4 cup sweet rice flour
2 tsp granulated sugar
2 tsp baking powder
1/4 tsp baking soda
1/4 tsp xanthan gum
1 tbsp buttermilk powder
1/4 tsp salt
5 tbsp cold butter cut into five pieces
1 large egg white
3 tbsp water
 
 
1. Preheat oven to 450 degrees F. Grease small baking sheet with cooking spray.
 
2. Mix brown rice flour, sweet rice flour, sugar, baking powder, baking soda, xanthan gum, buttermilk powder and salt in large bowl. Cut butter into rice flour mixture until it resembles coarse crumbs. Place in a smaller bowl. 
 
3. Use the same large bowl, place egg white in bowl and beat with an electric mixer until very frothy. Place rice flour mixture and water in egg white and beat for 1 minute.
 
4. Turn dough onto a board that has been dusted with rice flour and pat into a 1/4-inch thick circle. Using a 2-inch cutter cut out five rounds, reshaping dough scraps. Place biscuits on baking sheet.
 
5. Turn oven temp down to 400 degrees F, and bake biscuits for 12 minutes or until lightly brown. 


6. Biscuits can be stored in air tight container in fridge for 2 days. Reheat in oven and not microwave.


Saturday, August 10, 2013

GF Carrot Spice Muffins


 1 cup Brown Rice Flour Mix
1/3 cup granulated sugar
1/2 tbsp baking powder
1/2 tsp baking soda
1/4 tsp xanthan gum
1 tsp cinnamon
1/4 tsp nutmeg
1/8 tsp salt
1/2 cup finely shredded carrot
1/4 cup finely chopped toasted walnuts
1/4 cup sweetened shredded coconut
1/4 cup raisins
1/4 cup milk
1/4 cup vegetable oil
1 large egg
1/2 tsp vanilla
 
 
1. Preheat oven to 350 degrees.
 
2. Mix flour, sugar, baking powder, baking soda, xanthan gum, cinnamon, nutmeg, and salt in a medium mixing bowl. Add carrots, walnuts, coconut and raisins; stir to coat.
 
3. Combine milk and oil  in small bowl. Beat in egg and vanilla. Add liquid to flour mixture and mix until just blended.
 
4. Grease 6-cup muffin pan with cooking spray. Fill muffin pans 2/3 full. Sprinkle cinnamon sugar on top if you like. Bake for 18 - 25 minutes until light golden. Remove from pan and serve immediately or cool on rack.
 
5. If not eaten in three days, store in an air tight container in the fridge. Warm up before serving.


Monday, August 5, 2013

Gluten Free Banana Muffins


1 cup brown rice flour mix
1/3 cup granulated sugar
1/2 tbsp baking powder
1/2 tsp baking soda
1/3 tsp xanthan gum
1/8 tsp salt
1/2 tsp cinnamon
1 medium banana, mashed
1 large egg, room temperature
1/4 cup milk
1/4 cup vegetable oil
 
 
1. Preheat oven to 350 degrees. Grease six-cup muffin pan with cooking spray and set aside.
2. Mix flour, sugar, baking powder, baking soda, xanthan gum, salt & cinnamon in large mixing bowl. Add banana and nuts (if using) and stir to coat evenly.
3. Combine milk and oil in small bowl; remove 1/2 tablespoon of liquid and discard. Beat in egg. Add liquid to banana mixture and stir until just blended.
4. Fill muffins 2/3 full. Bake 18 - 25 minutes until golden brown. Remove from pan and serve immediately.
5. Muffins are best eaten within three days, or store in tightly sealed plastic container in refrigerator. Just warm up in toaster oven before serving.
 
Note: You can add 1/4 cup chopped walnuts  or 1/4 - 1/2 cup chocolate chips to the batter. Sprinkling maple sugar or brown sugar on top of muffins before baking adds a sweet crunch. And you can also add 1/4 cup of sweetened coconut to the recipe and it will be delicious ... I know, I tried it.

Wednesday, July 31, 2013

Gluten Free Brownies


2/3 cup Brown Rice Flour Mix
1/2 tsp salt
1/2 tsp baking powder
1/2 tsp xanthan gum
2 oz. unsweetened chocolate
4 oz. semisweet chocolate
1/2 cup unsalted butter
1 1/4 cups granulated sugar
2 tsp. pure vanilla extract
3 large eggs, room temperature
1/4 cup chopped toasted walnuts (optional)
 
 
1. Preheat oven to 325 degrees. Line bottom and sides of 8-inch square baking pan with foil and grease with cooking spray.
 
2. Combine flour, salt, baking powder, and xanthan gum in a small bowl. Set aside.
 
3. Melt butter and chocolate in a heavy, medium-size saucepan over low heat. Remove from heat and whisk in sugar and vanilla. Whisk in eggs, one at a time, and continue to whisk until mixture is completely smooth and glossy. Add flour mixture and whisk until just incorporated. Stir in nuts if using.
 
4. Pour batter into prepared pan and place in center of oven. Bake about 45 - 55 minutes or until a tester inserted into the center comes out with wet crumbs. Pour 1/2 cup of semisweet chocolate chips over top of brownie and let sit for 5 - 10 minutes. When all of chocolate has melted, use a knife to spread it all over the top. Remove brownies from pan by lifting out foil, and cool completely on rack. Cut into squares or triangles.
 
 
Note: I cut the brownies when they were still warm and they tasted just like a regular brownie. I ate my piece with an ice cold glass of milk, and hubby ate his with ice cream. Store the brownies in an airtight container and transfer to fridge if not eaten after 3 days. Brownies can be frozen but I have not tried it.
 
 
Gluten Free Brown Rice Flour mix:
 
2 cups Brown Rice Flour
2/3 cups Potato Starch
1/3 cups Tapioca Flour
 
1. Mix all together and store in an airtight container.


Thursday, July 4, 2013

Pesto Chicken Kebabs


3 boneless chicken breasts, cut into 1 1/2-inch cubes
24 cherry tomatoes
1 cup basil, chopped
1 garlic clove, diced
3 Tbsp. olive oil
1/4 cup shredded parmesan cheese
Salt & pepper
 
 
1. In a mini food processer, pulse basil, garlic, olive oil and parmesan cheese until well combined. Set pesto aside.
 
2. In acontainer with a top, place chicken cubes. Salt & pepper the chicken and mix with pesto. Put top on and place in fridge for 2- 4 hours.
 
3. Soak eight wooden skewers in water for at least 30 minutes.
 
4. Place three chicken cubes and three cherry tomatoes on a skewer ... alternating chicken and cherry tomato.
 
5. Grill 8 minutes on each side or until thoroughly cooked. Seve with salad and pasta salad.


Saturday, June 29, 2013

Blueberry Buttermilk Bundt Cake


2 sticks unsalted butter, at room temperature
3 cups all-purpose flour
2 1/2 tsp baking powder
1 1/4 tsp salt
1 3/4 cups granulated suger
1/4 cup vegetable oil
4 large eggs, at room temperature
1 tsp vanilla extract
3/4 cup buttermilk
2 cups blueberries
 
 
1. Preheat to 350 degrees. Generously butter a nonstick 12-cup Bundt pan.
 
2. Whisk the flour, baking powder and salt in a medium bowl. Set aside.
 
3. Beat butter, sugar and vegetable oil in a bowl with a mixer on medium high speed until fluffy, scraping down the sides of the bowl. Add eggs, one at a time, then add vanilla.
 
4. Add one-third of flour mixture and fold in with a rubber spatula or wooden spoon. Add half of the buttermilk and mix well. Continue until all the flour and buttermilk are used up.
 
5. Toss the blueberries with 2 tablespoons of flour in a small bowl.
 
6. Spoon one-third of the batter evenly into the prepared pan. Sprinkle in half of the blueberries and then top with another one-third of the batter. Scatter the remaining blueberries on top and cover with the rest of the batter, and smooth the top.
 
7. Bake until the cake is golden brown and a toothpick inserted into the center comes out clean, about an hour. Transfer to a rack and let cool 30 minutes in the pan. Loosen cake from pan, then invert onto a rack to cool completely.
 
8. When cake is cold, mix 1 cup confectionary sugar, 2 tablespoon milk and flavoring of your choice. I used Penzy's lemon powder. Let stand for a little while until of thick enough consistency to drizzle on cake.


Makes a beautiful tall cake.

 
The crumb is tender and cake is delicious with coffee or tea.


Wednesday, June 26, 2013

Lemon-herb Roast Chicken

Ah, roast chicken ... it holds a special place in my memories and taste buds! It was a dish we requested for birthdays and special occasions. We grew up by the sea and dinner was more likely to be something bought fresh off the boats. Having chicken was special and there was always much anticipation.

It took me a long time to try roasting chicken but I did take the plunge, and found out that I can make roast chicken as good as my mom's ... you just have to make it with love and time it right. I have a few simple recipes that I use but the lemon-herb recipe below is one of my favorites. It smells wonderful roasting in the oven and it tastes just as great. And every time I roast a chicken ... my mother is right there with me.


1/2 cup butter (1 stick), room temperature
2 Tbsp chopped fresh rosemary or 2 tsp. dried
2 Tbsp chopped fresh thyme or 2 tsp dried
3 cloves garlic, minced
1 6 1/2 to 7 lb roasting chicken
1 1/2 tsp grated lemon rind
 
 
1. Combine butter, rosemary, thyme, garlic & lemon rind in a small bowl.
 
2. Preheat oven to 450 degrees. Rinse chicken; pat dry.
 
3. Slide hand under skin of chicken and loosen from meat around the breast area. Set aside 2 tablespoons of butter mixture for use in sauce. Spread half of remaining butter under the skin and spread the rest all over the chicken. Season all over with salt and pepper. Be sure to season inside the chicken cavity as well. Tie legs together to hold shape.
 
4. Place chicken in heavy roasting pan. Roast 20 minutes. Reduce oven temperature to 375. Roast chicken until juices run clear when thickest part of  thigh is pierced with a knife, usually about 1 hour 25 minutes to 1 hr 50 minutes.
 
5. Remove chicken from pan and cover with foil. Pour chicken juices into a saucepan and skim off fat. Add 1/4 cup dry white wine (I have even used champagne!) and the reserved butter to pan juices, and bring to a boil. Make a slurry of 2 teaspoons cornstarch and 2 teaspoons water, and add to pan gradually until sauce is of desired thickness. Season with salt and pepper. Slice roast chicken and serve with sauce.


Sunday, June 16, 2013

Popovers (Gluten free)


1 cup all-purpose gluten-free flour
1/2 tsp. xanthan gum
1/2 tsp. kosher salt
1 Tbsp. unsalted butter, melted and cooled
2 extra-large eggs, lightly beaten, at room temperature
1 cup milk (lowfat but not fatfree), at room temperature
 
 
1. Preheat the oven to 400 degrees. Grease well a 6-cup popover pan or 12 muffin pans.
 
2. In a large bowl, whisk together the flour, xanthan gum and salt. Add the butter, eggs, and milk, whisking well after each addition until the batter is smooth.
 
3. Pour the batter into muffin pans, filling just under halfway. Place the pans in the center of the preheated oven and make for a total of 30 minutes. After the first 20 minutes, with a sharp knife, pierce the top of each popover to let steam escape so the popovers will maintain their puffiness.
 
4. Serve hot with butter and jam.
 
Gluten free flour mixture:
2 cups brown rice flour
2/3 cups potato starch
1/3 cup tapioca starch
 
1. Mix together and store in an airtight container until ready to use.


Strawberry Jam


2 lb fresh strawberries, hulled
4 cups sugar
1/4 c lemon juice
 
 
1. In a large bowl, crush strawberries until you have 4 cups of strawberries. I used a potato masher and not the blender because I like pieces of strawberry in my jam.
 
2. In a heavy bottom pot mix strawberries, sugar and lemon juice. Stir over low heat until sugar is dissolved. Increase heat to medium and bring to a rolling boil. Stir constantly until mixture reaches 220 degrees. Remove from heat.
 
3. Pour about two inches of water into a large saucepan, place mason jars upside down in the water, place the lids in there as well, put pot cover on and boil for 12 minutes.
 
4. Using sterile tongs lift jars and lids out and place on paper towel lined platters. Pour strawberry jam into jars. Put lids on securely. Place a rack in a large pot, put the filled jars in, not touching each other, put pot cover on and bring to a boil for about 12 minutes.
 
5. Remove jam jars from pot and let cool on counter until completely cold. Jars will "ping" as they cool and seal.
 
6. Only refrigerate if jar has been opened.


Note: I made my jam with two cups of mashed strawberries and 1 1/4 cups sugar, and two tablespoons of lemon juice; boiled the mixture for 20 minutes or until temperature reaches 200 degrees. It made enough jam for a jar and a half.


Wednesday, May 29, 2013

Cheesecake cupcakes


12 vanilla wafers
8 oz. 1/3 less fat cream cheese
1/4 c sugar
1 tsp. vanilla
6 oz. fat free vanilla Greek yogurt
2 large egg whites
1 tsp. cornstarch
 
 
1. Preheat oven to 350 degrees.
2. Line 12 muffin pans with cupcake liners. Place a vanilla wafer in each liner.
3. Beat cream cheese and sugar together until light and fluffy. Add vanilla, greek yogurt, egg whites and cornstarch and mix until combined.
4. Spoon equal amounts into cupcake liners. Bake for 20 - 25 minutes. Remove from oven and cool on wire racks. When completely cool, place in refrigerator. Serve cold with fresh sliced strawberries and berries.


Summer Pasta Salad


5 oz. spiral pasta (I used GF rice pasta)
1/3 c sundried tomatoes (sliced into strips)
2 Tbsp. capers, drained
2 Tbsp. balsamic vinegar
1 1/2 tsp. extra-virgin olive oil
salt & pepper
2 Tbsp. freshly shaved parmagiana-reggiano
1 cup spinach leaves
1 cup sliced grape tomatoes
 
1. Boil pasta according to package directions. Drain and rinse with cold water and set aside.
2. Mix sundried tomatoes, capers, balsamic vinegar & olive oil in a container.
3. When ready to serve, pour dressing over pasta and toss. Season with salt & pepper. Add spinach leaves and grape tomatoes and serve.


Note: Eat all of the salad on the same day. We discovered that putting the leftovers in the fridge made the GF pasta hard. I don't know whether heating it up would have softened the pasta -- we just dumped the leftovers.


Tuesday, May 14, 2013

Garlic Dijon Herb Salmon


4 garlic cloves, minced
1 tsp Herbs de Provence
1 tsp red wine vinegar
1 tsp olive oil
2 Tbsp dijon mustard
4 (6 oz) salmon pieces/ fillets
Salt & fresh ground pepper
 
 
1. Preheat oven to 375 degrees.
 
2. Spray a baking sheet with vegetable oil. Place salmon pieces on pan, and salt and pepper them.
 
3. Mix garlic, Herbs de Provence, red wine vinegar, olive oil, and dijon mustard in a small bowl. Spoon one teaspoon of mixture on each salmon piece, and spread it over the top.
 
4. Bake salmon in oven for 15 - 18 minutes or until done to your satisfaction. Serve hot.


Wednesday, April 17, 2013

Granola, Oh, Granola


3 cups old fashioned oats
1/2 cup vegetable oil
1/4 cup honey
3 Tbsp. brown sugar
1/4 cup sliced almonds
1/4 cup golden raisins or dried cranberries
salt
 
 
1. Preheat oven to 325 degrees.
 
2. In a large bowl mix oats, vegetable oil, honey & brown sugar. It's easier if you use your hand.
 
3. Line a cookie sheet with parchment paper. Spread oat mixture on parchment paper evenly.
 
4. Bake for 15 minutes, stirring every five minutes. When 15 minutes are up, add sliced almonds to oat mixture and return to pan for another 7 - 10 minutes, making sure to stir every five minutes. Make sure that you do not allow the granola to brown too much.
 
5. Remove from oven and allow to cool for about 15 minutes before you add the dried fruit and stir. Sprinkle some sea salt or pinch of cinnamon.


Note: This is a great snack. Wonderful on yogurt and sprinkled over ice cream as well.


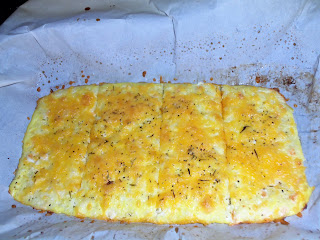
Cauliflower Cheesy Bread

This is good. Experiment with seasonings to jazz it up.


1 cup cauliflower, grated
1 egg, beaten
1 cup shredded fresh mozzarella
1/2 cup cheddar or any other cheese


1. Preheat the oven to 360 degrees.
 
2. In a medium bowl mix the grated cauliflower, egg and shredded mozzarella until well blended.
 
3. Line a cookie tray with parchment paper and spray lightly with vegetable spray. Pour the cauliflower mixture into the lined pan and spread out into a rectangle shape.
 
4. Bake for 30 minutes. Once time is up, remove from oven, and flip the cheesy bread. Sprinkle cheddar cheese over the bread. Sprinkle your seasonings over the cheese (I used salt, pepper, garlic powder & rosemary), return to oven and bake for another 10 minutes.
 
5. Remove from oven and let sit for about 10 minutes before slicing into quarters. You can serve with marinara sauce or eat it on its own.


Balsamic Chicken and Roasted Vegetables


2 boneless chicken breasts, each sliced in half to make four breasts
3 medium carrot, sliced
2 cups of broccoli florets
1 medium sweet potato, sliced
10 spears of asparagus
1/2 red onion, quartered
salt & pepper
 
Marinade:
1/2 cup balsamic vinegar
1/4 cup extra virgin olive oil
1 Tbsp. brown sugar
2 cloves garlic, minced
3 Tbsp. fresh rosemary, chopped
2 Tbsp. thyme or oregano
4 leaves sage, chopped or 1/2 tsp. dried sage


1. Preheat the oven to 365 degrees. Salt and pepper both sides of chicken breasts and place in a baking dish. Arrange onions around dish and set aside.
 
2. Drizzle some olive oil in a large baking dish. Arrange vegetables in the dish -- I kept the vegetables separate. Sprinkle salt & pepper and tosh vegetables.
 
3. Mix marinade ingredients together. Spoon half of marinade over chicken breasts, making sure to coat both sides. Spoon the other half of marinade over the vegetables, making sure to coat all sides.
 
4. Place both dishes in the oven and bake for 30 minutes. Serve immediately.


Sunday, March 31, 2013

Flourless Chocolate Cake

Yes, you can eat cake when you go wheatfree. This flourless chocolate cake that I made for Easter dinner got the two thumbs up from the family. Need a chocolate cake fix? This did it for us.
 
 
6 oz. semi-sweet chocolate chips
1/2 cup butter
3/4 cup sugar
3 large eggs, room temperature
1/2 cup cocoa powder, sifted
1/4 tsp. salt
1 tsp. vanilla
 
 
1. Preheat oven to 350 degrees F. Grease a 7-inch spring form pan and line bottom with parchment paper and grease that too.
 
2. Melt butter and chocolate on double boiler until all chocolate is melted. Add sugar and salt and cook for 1 minute.
 
3. Remove from heat. Whisk in eggs, one at a time. Add vanilla and whisk well. Blend cocoa into mixture and whisk to combine.
 
4. Pour batter into prepared pan. Bake in oven for 22 - 25 minutes until center is just set but still shiny.
 
5. Cool on wire rack. Do not be alarmed because the cake will collapse. Once completely cool, wrap tightly and store at room temperature or store in fridge. If you store it in the fridge, microwave for 8 seconds before serving with strawberries and whipped cream.


Saturday, February 16, 2013

Cloud Bread

Sarah and I are exploring new ways of eating healthy --- there will be all kinds of recipes on this blog that no one would ever associate with us, but it's a commitment to a different way of life. This cloud bread is my first wheat free bread. I made myself a sandwich at lunch today and it works for me! Even with the first batch I had already started experimenting with seasonings.

 
3 eggs, room temperature, and separated
3 Tbsp. whole milk small curd cottage cheese
1/4 tsp. cream of tartar
1 (1 g) artificial sweetener
 
 
1. Preheat oven to 300 degrees.
 
2. Separate the eggs carefully. Place the egg whites in a glass or metal bowl.
 
3. Add the cream of tartar to the egg whites and beat on high speed until soft peaks form.
 
4. To the bowl with the egg yolks, add the cottage cheese and sweetener, and mix well. Fold one third of the egg whites into the egg yolk mixture. Fold the egg whites gently so they remain fluffy. Continue folding in the egg whites in thirds until all is mixed in.
 
5. Spray a large cookie sheet with a vegetable cooking spray.
 
6. With a large spoon, scoop and mound the mixture into 10 even rounds on the baking sheet.
 
7. Bake on the middle rack for 22 - 30 minutes. Keep watching to make sure that the rounds get to a nice golden brown.
 
8. Remove the pan from the oven. Let the rounds cool for 2 minutes in the pan and then gently remove them from the pan and place them on a wire rack to cool completely.
 
9. When they are cooled completely, place them in a ziplock storage bag or a plastic container. This will give them the soft chewing texture of bread.


My pecorino, rosemary and garlic crusted cloud bread sandwich
 
 
Note: I grated some pecorino-romano cheese, mixed it with a pinch of dried rosemary and garlic powder and used that as a topping on five of the rounds. It was an excellent choice.